

Understanding the SCuBA approach
Over time, a Microsoft 365 tenant accumulates decisions, exceptions, and technical legacies. A strategy created in an emergency, a protocol retained for a business application, or an external share open during a project can be installed sustainably. The SCuBA audit allows the supposed architecture to be compared to the actual observed configuration.
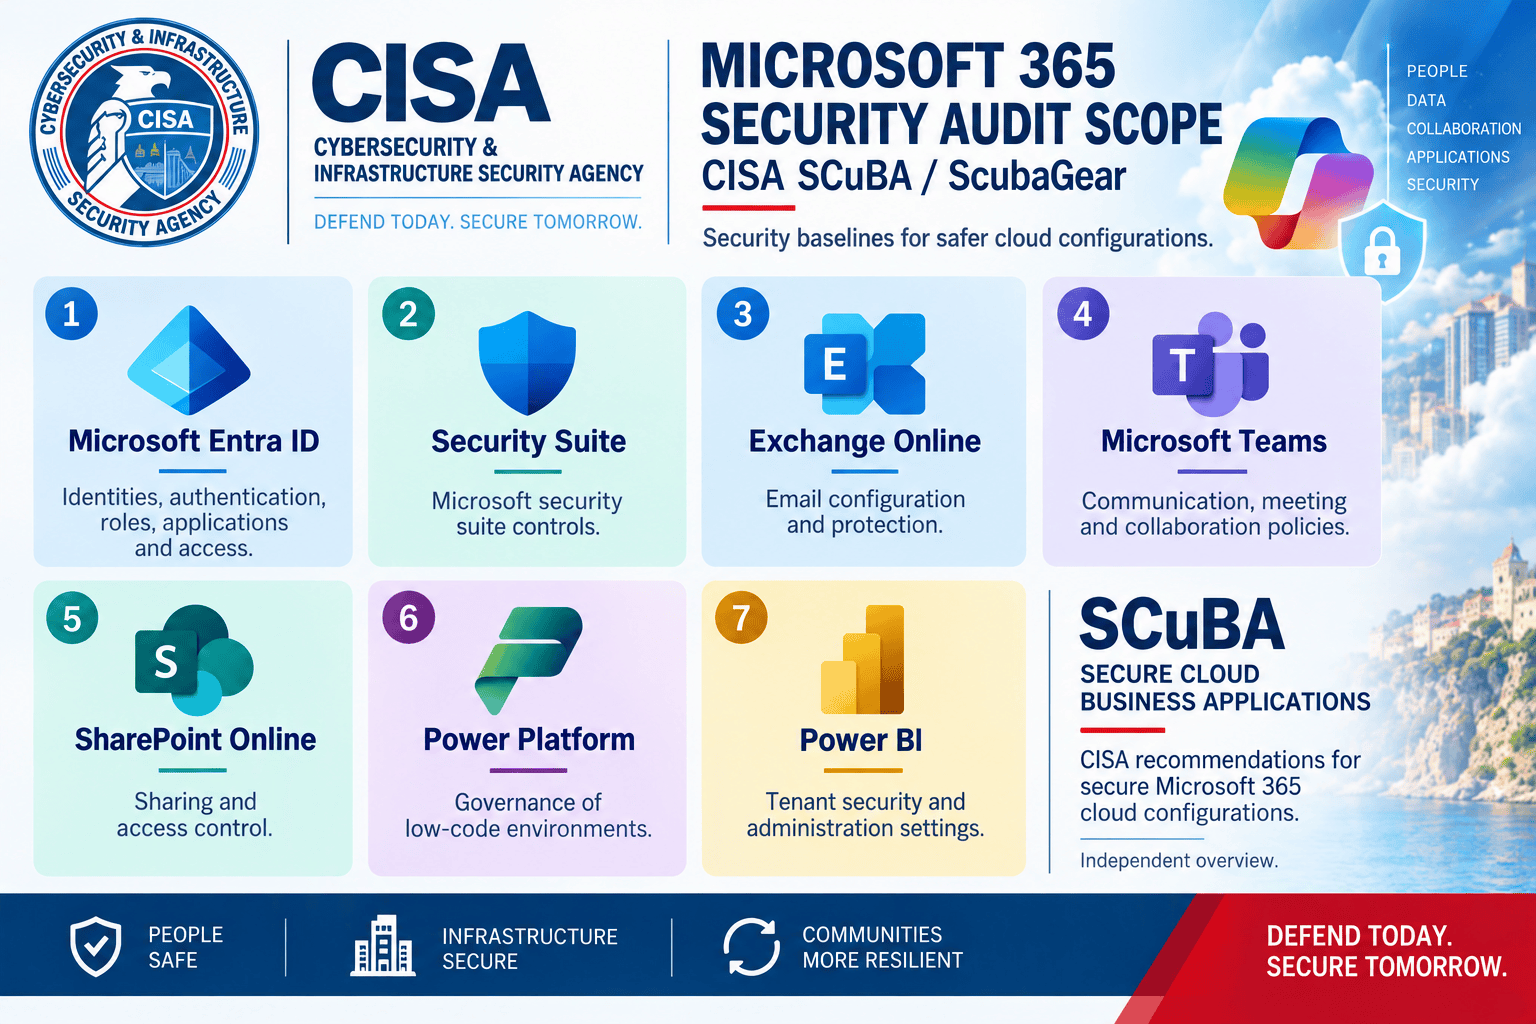
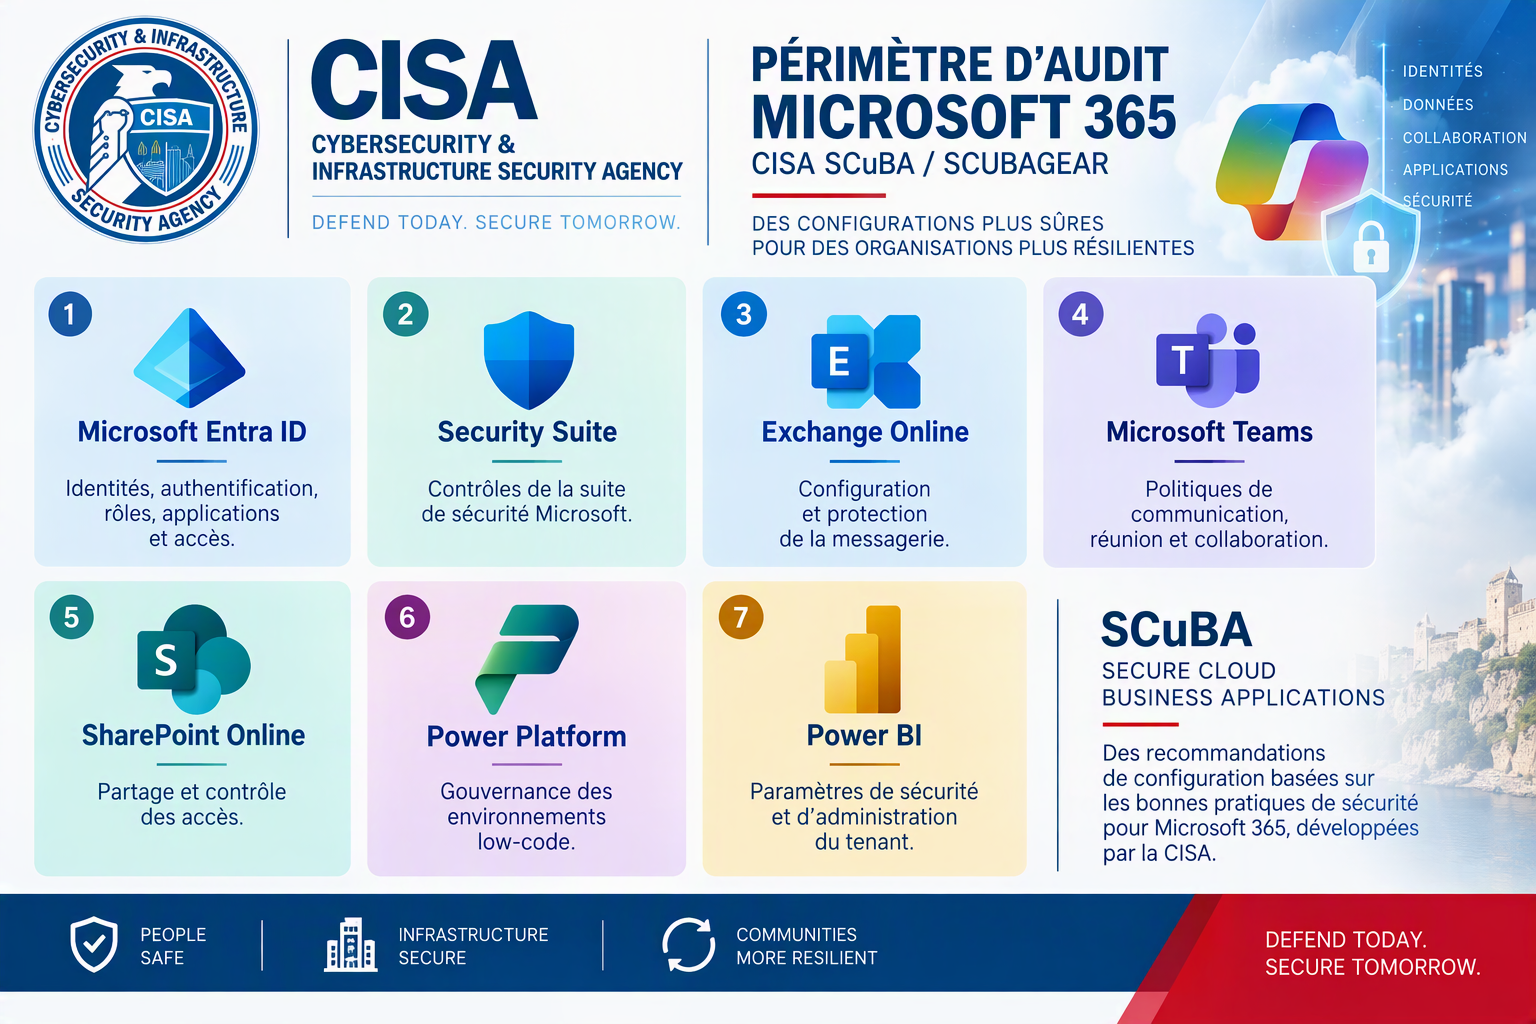
The purpose of this post is to give you all the information you need to succeed in your first audit with these tools.
2. Precautions
- Use a controlled administration station.
- Use an account separate from the current office account. (Important)
- Activate only the necessary roles, ideally via Microsoft Entra PIM.
- Store reports in a protected and backed up location. (Important too!)
- Track the ScubaGear version, scope, YAML configuration, and executed commands.
So here are the steps you should follow
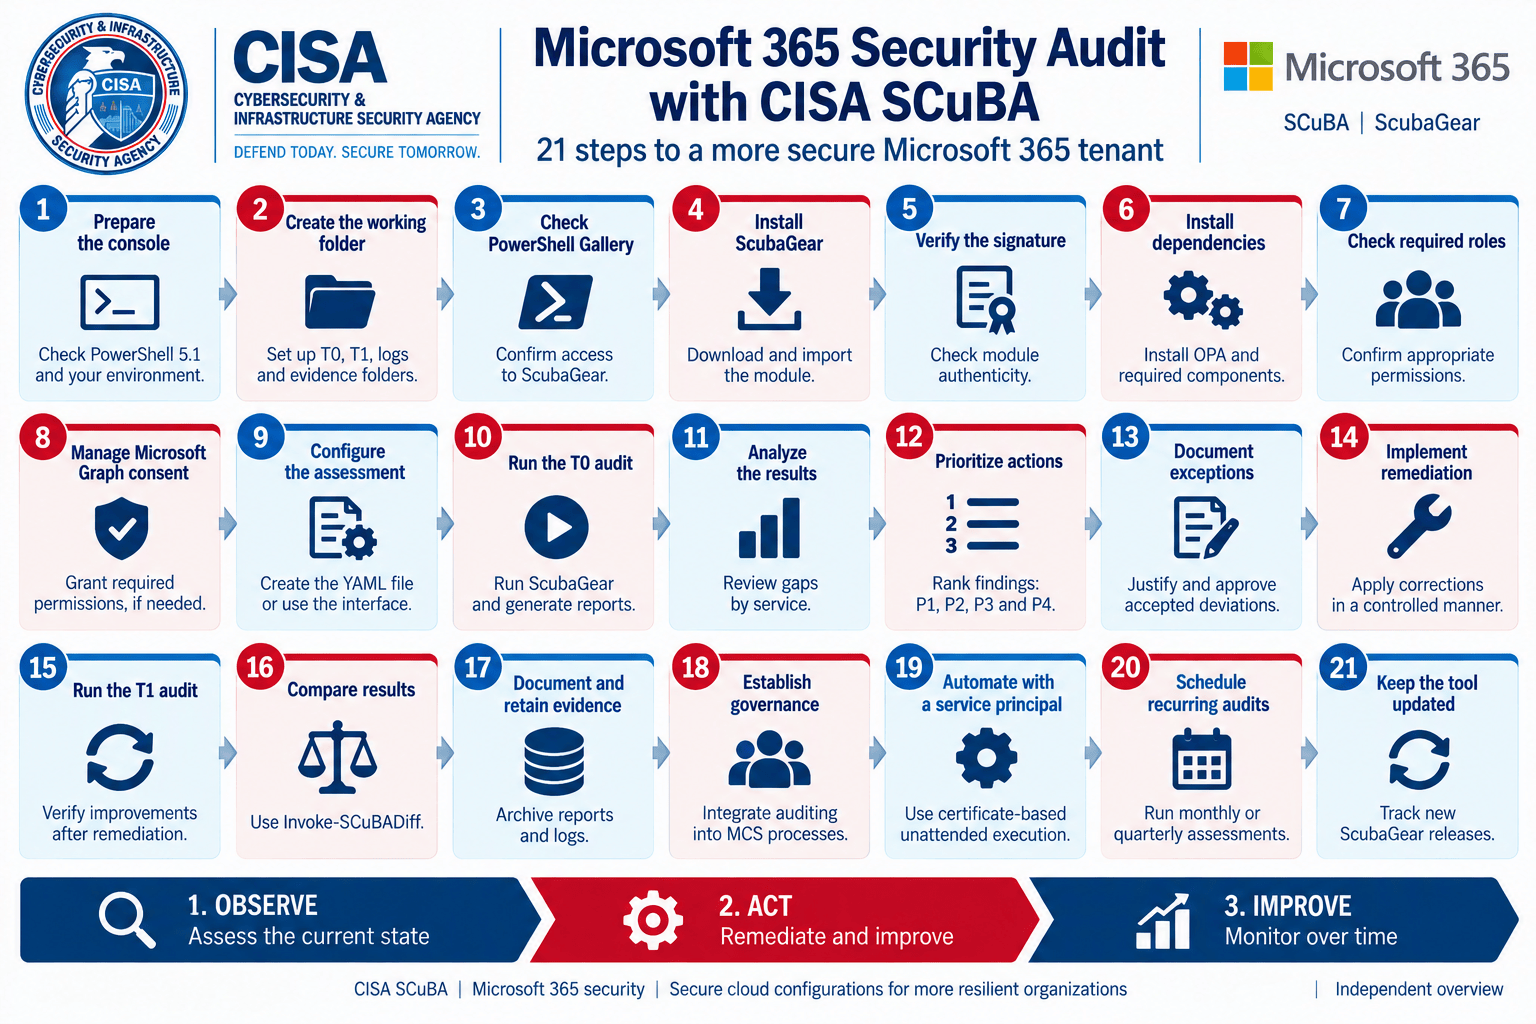
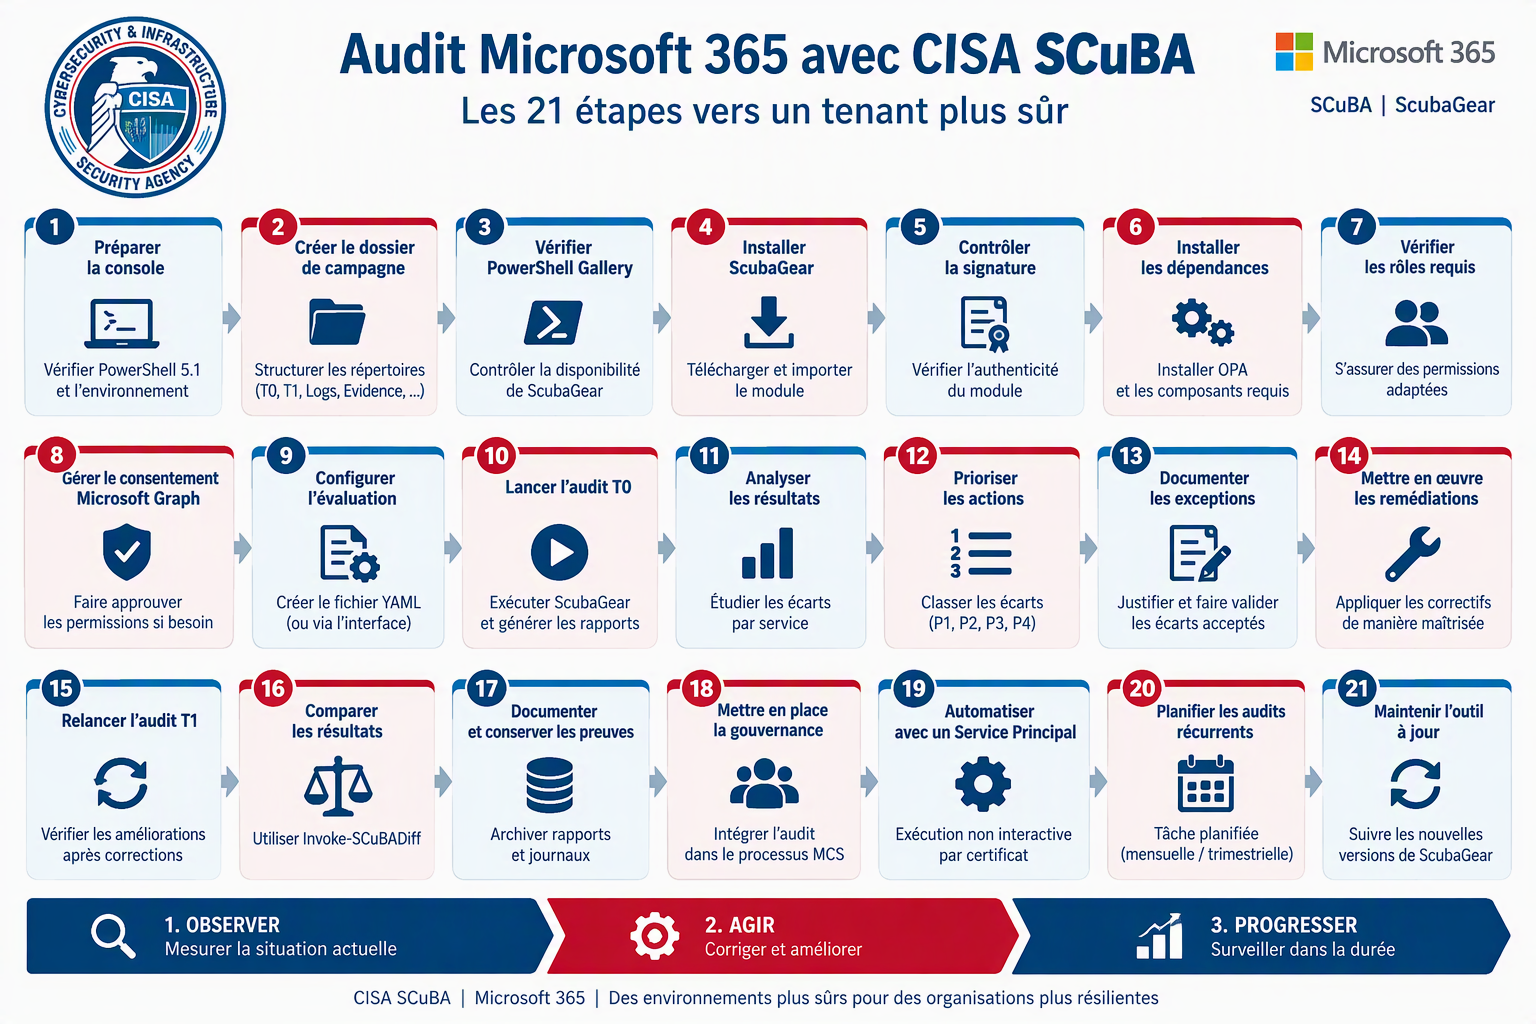
Step 1 – Check the PowerShell console
ScubaGear 2.0.0 requires Windows PowerShell 5.1 Desktop. Open powershell.exe, then check the version, process architecture, and execution policies.
$PSVersionTable | Format-List PSVersion, PSEdition, OS
[Environment]::Is64BitProcess
Get-ExecutionPolicy -List
Step 2 – Create the campaign folder
Even before launching ScubaGear, it is important to prepare a clearly structured workspace. This step may seem purely administrative, but it actually determines the traceability and reproducibility of the entire audit campaign. The goal is to never mix initial results, evidence, reports obtained after remediation, and technical logs.
$AuditRoot = “C:\M365-Audits\SCuBA”
$RunStamp = Get-Date -Format “yyyyMMdd-HHmmss”
$CampaignRoot = Join-Path $AuditRoot “Campaign-$RunStamp”
$Folders = @(“Config”,”T0″,”T1″,”Diff”,”Evidence”,”Logs”,”Remediation”)
New-Item -Path $CampaignRoot -ItemType Directory -Force | Out-Null
$Folders | ForEach-Object { New-Item -Path (Join-Path $CampaignRoot $_) -ItemType Directory -Force | Out-Null }
Get-ChildItem $CampaignRoot
$EnvironmentInfo = [PSCustomObject]@{ CampaignDate=Get-Date; ComputerName=$env:COMPUTERNAME; UserName=$env:USERNAME PowerShellVersion=$PSVersionTable.PSVersion.ToString(); PowerShellEdition=$PSVersionTable.PSEdition
Is64BitProcess=[Environment]::Is64BitProcess
}
$EnvironmentInfo | Export-Csv (Join-Path $CampaignRoot “Evidence\AuditEnvironment.csv”) -NoTypeInformation -Encoding UTF8
Step 3 – Check PowerShell Gallery
Check the repository and published versions before installation.
Get-PSRepository -Name PSGallery | Format-List Name, SourceLocation, InstallationPolicy
Find-Module -Name ScubaGear -Repository PSGallery | Format-List Name, Version, Repository, PublishedDate
Find-Module -Name ScubaGear -Repository PSGallery -AllVersions |
Sort-Object Version -Descending | Select-Object -First 10 Name, Version, PublishedDate
Step 4 – Install ScubaGear
Install an accurate version to ensure the reproducibility of the campagne.la latest version at the time of writing this article is version 2.0
Install-Module -Name ScubaGear -RequiredVersion 2.0.0 -Repository PSGallery -Scope CurrentUser
Import-Module -Name ScubaGear -RequiredVersion 2.0.0 -Force
Get-Module -Name ScubaGear | Format-List Name, Version, Path
Get-InstalledModule -Name ScubaGear | Format-List Name, Version, InstalledLocation
Test-ScubaGearVersion
Get-Command -Module ScubaGear | Sort-Object Name | Format-Table Name, CommandType
Get-InstalledModule ScubaGear | Select Name,Version,InstalledLocation |
Export-Csv (Join-Path $CampaignRoot “Evidence\ScubaGearVersion.csv”) -NoTypeInformation -Encoding UTF8
Step 5 – Check signature and fingerprint
Document the manifest actually used.
$InstalledModule = Get-InstalledModule -Name ScubaGear
$ManifestPath = Join-Path $InstalledModule.InstalledLocation “ScubaGear.psd1”
Get-AuthenticodeSignature $ManifestPath | Format-List Status,StatusMessage,SignerCertificate,TimeStamperCertificate,Path
Get-FileHash -Path $ManifestPath -Algorithm SHA256 |
Export-Csv (Join-Path $CampaignRoot “Evidence\ScubaGearManifestHash.csv”) -NoTypeInformation -Encoding UTF8
Step 6 – Install the dependencies
ScubaGear notably uses Open Policy Agent and authentication components.
Install-ScubaDependencies
Get-ScubaGearDependencyStatus
$ScubaHome = Join-Path $HOME “.scubagear”
Get-ChildItem -Path $ScubaHome -Recurse -Force | Select FullName,Length,LastWriteTime
# If OPA was not installed correctly:
Install-OPAforSCuBA
Get-ScubaGearDependencyStatus
Step 7 – Check the roles
Apply the lowest privilege. Do not assign Global Administrator solely to simplify execution.
Get-Help -Name Invoke-SCuBA -Full
| Product | Minimal documented role |
| Enter ID | Global Reader |
| Security Suite | Global Reader ou Exchange Administrator |
| Exchange Online | Global Reader ou Exchange Administrator |
| Power BI | Fabric Administrator or Global Administrator, with an appropriate license |
| Power Platform | Power Platform Administrator with appropriate license |
| SharePoint Online | Global Reader ou SharePoint Administrator |
| Microsoft Teams | Global Reader ou Teams Administrator |
Step 8 – Create the YAML configuration
The YAML configuration turns a one-time run into a repeatable campaign.
Start-SCuBAConfigApp
# With Microsoft Graph search functions:
Start-SCuBAConfigApp -Online
$ConfigPath = Join-Path $CampaignRoot “Config\scuba_compliance.yaml”
# Alternative: generate a template
Push-Location (Join-Path $CampaignRoot “Config”)
New-SCuBAConfig
Pop-Location
Rename-Item (Join-Path $CampaignRoot “Config\SampleConfig.yaml”) -NewName “scuba_compliance.yaml”
notepad.exe $ConfigPath
Step 9 – Perform an Entra ID test
Start with a reduced scope to validate dependencies, authentication, permissions, and reporting.
$T 0path = join-text $CampaignRoot “T0”
$TranscriptPath = Join-Path $CampaignRoot “Logs\T0-Entra-$RunStamp.log”
Start-Transcript -Path $TranscriptPath
Invoke-SCuBA -ProductNames aad -OutPath $T0Path -DarkMode
Stop-Transcript
Step 10 – Test each workload
Run the products separately to isolate rights or connectivity issues.
Invoke-SCuBA -ProductNames aad -OutPath $T0Path
Invoke-SCuBA -ProductNames securitysuite -OutPath $T0Path
Invoke-SCuBA -ProductNames exo -OutPath $T0Path
Invoke-SCuBA -ProductNames sharepoint -OutPath $T0Path
Invoke-SCuBA -ProductNames teams -OutPath $T0Path
Invoke-SCuBA -ProductNames powerbi -OutPath $T0Path
Invoke-SCuBA -ProductNames powerplatform -OutPath $T0Path
# Several products:
Invoke-SCuBA -ProductNames aad,exo,sharepoint,teams -OutPath $T0Path
Step 11 – Launch the T0 photo
T0 represents the initial state of the tenant, before any remediation.
$T0Transcript = Join-Path $CampaignRoot “Logs\T0-Full-$RunStamp.log”
Start-Transcript -Path $T0Transcript
Invoke-SCuBA -ProductNames * -ConfigFilePath $ConfigPath -OutPath $T0Path -DarkMode
Stop-Transcript
Step 12 – Identify and inventory the results
Retrieve the latest timestamped subdirectory created by ScubaGear.
$T0RunFolder = Get-ChildItem -Path $T0Path -Directory |
Sort-Object LastWriteTime -Descending | Select-Object -First 1
$T0RunFolder.FullName
Get-ChildItem -Path $T0RunFolder.FullName -Recurse | Select FullName,Length,LastWriteTime
Step 13 – Open the HTML report
Start with the summary, then analyze the services by prioritizing identities and privileges.
$HtmlReport = Get-ChildItem -Path $T0RunFolder.FullName -Filter “BaselineReports.html” -Recurse | Select-Object -First 1
Invoke-Item $HtmlReport.FullName
Step 14 – Analyze the CSV results
Produce targeted views on failures, warnings, and unevaluated controls.
$CsvPath = Get-ChildItem -Path $T0RunFolder.FullName -Filter “ScubaResults.csv” -Recurse | Select-Object -First 1
$Results = Import-Csv $CsvPath.FullName
$Results | Group-Object Result | Sort-Object Name | Select Name,Count | Format-Table -AutoSize
$Failures = $Results | Where-Object Result -eq “Fail”
$Failures | Export-Csv (Join-Path $CampaignRoot “Remediation\T0-Failures.csv”) -NoTypeInformation -Encoding UTF8
$Warnings = $Results | Where-Object Result -eq “Warning”
$NotEvaluated = $Results | Where-Object { $_. Result -eq “N/A” -or $_. Criticality -like “*Not-Implemented*” }
Step 15 – Preserve the evidence
Calculate fingerprints before any manipulation and keep an immutable archive of the original results.
$HashPath = Join-Path $CampaignRoot “Evidence\T0-FileHashes.csv”
Get-ChildItem $T0RunFolder.FullName -File -Recurse | Get-FileHash -Algorithm SHA256 |
Select Path,Algorithm,Hash | Export-Csv $HashPath -NoTypeInformation -Encoding UTF8
$ArchivePath = Join-Path $CampaignRoot “Evidence\T0-OriginalResults.zip”
Compress-Archive -Path (Join-Path $T0RunFolder.FullName “*”) -DestinationPath $ArchivePath -CompressionLevel Optimal
Get-FileHash $ArchivePath -Algorithm SHA256 |
Export-Csv (Join-Path $CampaignRoot “Evidence\T0-ArchiveHash.csv”) -NoTypeInformation -Encoding UTF8
Step 16 – Prepare the remediation plan
Work on a copy of the plan produced by ScubaGear and enrich it with risk, decision, accountability, deadline, and evidence.
$ActionPlanSource = Get-ChildItem $T0RunFolder.FullName -Filter “ActionPlan.csv” -Recurse | Select-Object -First 1
$WorkingActionPlan = Join-Path $CampaignRoot “Remediation\ActionPlan-Working.csv”
Copy-Item $ActionPlanSource.FullName $WorkingActionPlan
Invoke-Item $WorkingActionPlan
| Priority | Interpretation |
| P1 | Critical risk or direct exposure requiring immediate analysis |
| P2 | High risk with impact assessment before modification |
| P3 | Planned improvement |
| P4 | Documented, approved, and periodically reassessed exception |
Step 17 – Remedy with caution
There is no safe universal control. Each fix must be linked to the relevant control, tested on a pilot perimeter, and accompanied by a rollback. For Conditional Access, prioritize Report-only before activation.
Step 18 – Restart the Q1 audit
After remediation, take a new photograph with the same perimeter and configuration.
$T 1text = join-path $CampaignRoot “T1”
$T1Stamp = Get-Date -Format “yyyyMMdd-HHmmss”
$T1Transcript = Join-Path $CampaignRoot “Logs\T1-Full-$T1Stamp.log”
Start-Transcript -Path $T1Transcript
Invoke-SCuBA -ProductNames * -ConfigFilePath $ConfigPath -OutPath $T1Path -DarkMode
Stop-Transcript
$T1RunFolder = Get-ChildItem $T1Path -Directory | Sort LastWriteTime -Descending | Select -First 1
Step 19 – Compare T0 and T1
The comparison identifies actual corrections, new failures, and baseline changes.
$BeforeJson = Get-ChildItem $T0RunFolder.FullName -Filter “ScubaResults_*.json” -Recurse | Select -First 1
$AfterJson = Get-ChildItem $T1RunFolder.FullName -Filter “ScubaResults_*.json” -Recurse | Select -First 1
$DiffPath = Join-Path $CampaignRoot “Diff”
Invoke-SCuBADiff -BeforePath $BeforeJson.FullName -AfterPath $AfterJson.FullName -OutPath $DiffPath -DarkMode
$DiffReport = Get-ChildItem $DiffPath -Filter “DiffReport.html” | Select -First 1
Invoke-Item $DiffReport.FullName
Step 20 – Prepare the automation
So far, ScubaGear audits have been conducted interactively: an administrator logs in with PowerShell, authenticates with Microsoft 365, then starts the assessment. This method is perfectly suited for a spot audit. However, it becomes restrictive as soon as you want to run ScubaGear regularly.
The goal of this step is therefore to create in Microsoft Entra ID an application identity dedicated to ScubaGear, authenticated by certificate. ScubaGear can then perform its collections without an administrator having to enter their credentials or validate an MFA at each execution. The CISA documentation precisely provides for this non-interactive operation.
Creating a service principal modifies Entra ID. It must be submitted to the change process. Always start with -WhatIf.
New-ScubaGearServicePrincipal -M365Environment commercial `
-ProductNames “aad”,”exo”,”sharepoint”,”teams”,”securitysuite”,”powerplatform” -WhatIf
$NewSP = New-ScubaGearServicePrincipal -M365Environment commercial `
-ProductNames “aad”,”exo”,”sharepoint”,”teams”,”securitysuite”,”powerplatform” `
-ServicePrincipalName “ScubaGear-Production”
Get-ScubaGearAppPermission -AppID $NewSP.AppID -M365Environment $NewSP.M365Environment -ProductNames $NewSP.ProductNames
Get-ScubaGearAppCert -AppID $NewSP.AppID
Invoke-SCuBA -ProductNames * -CertificateThumbprint $NewSP.CertThumbprint `
-AppID $NewSP.AppID -Organization “votretenant.onmicrosoft.com” `
-OutPath “C:\M365-Audits\SCuBA-Automated”
Step 21 – Check for updates
ScubaGear evolves regularly. CISA recommends periodically checking if a new version of the module or its dependencies is available. The preferred method in the official documentation is installation and updating via PowerShell Gallery, under Windows PowerShell 5.
Import-Module ScubaGear -Force
Test-ScubaGearVersion
Update-ScubaGear
Install-ScubaDependencies
Get-ScubaGearDependencyStatus
Get-Module ScubaGear | Format-List Name,Version,Path
3. Expected deliverables
- YAML configuration used and versioned.
- ScubaGear version and dependency inventory.
- PowerShell transcription logs.
- Original T0 results, archive, and SHA-256 fingerprints.
- Enhanced remediation plan and monitoring.
- Evidence of approved and implemented changes.
- Q1 results and difference report.
- Exception log and next audit date.
4. SCuBA et Microsoft Secure Score
The two approaches are complementary. Microsoft Secure Score provides Microsoft’s native view of possible improvements. CISA SCuBA provides an external, explicit, and versioned repository. The Government of Monaco will benefit from cross-referencing these results with Microsoft Defender, internal security policy, risk analysis, internal and external audits, as well as with business constraints and approved exceptions.
Conclusion
ScubaGear should not be reduced to a generator of green, red, and yellow reports. Its value lies in the gap it reveals between the expected configuration and the actual configuration. A Pass is not an absolute guarantee; a Fail is not automatically a critical vulnerability. The right approach is to understand, prioritize, test, document, and verify over time.
If you want to go further, here are some related guides and articles from WorkingTogether.fun:
- Complete Guide to Securing a Microsoft 365 Tenant
A practical overview of the essential security controls for Microsoft Entra ID, Exchange Online, Teams, SharePoint, OneDrive, Microsoft Purview and Microsoft Defender. [workingtogether.fun] - Complete Guide to Securing Microsoft Exchange Online
Explore how to protect Exchange Online against phishing, account compromise, BEC attacks and other messaging threats. [workingtogether.fun] - Complete Guide to Securing Microsoft Teams
Learn how to secure identities, meetings, external access, guest accounts, applications and shared content in Microsoft Teams. [workingtogether.fun] - Conditional Access Policy Plans: Simplifying Microsoft Entra ID
Discover how Conditional Access Policy Plans can help structure and manage security policies in Microsoft Entra ID. [workingtogether.fun]